We’ve all been there. You’re tired of your current Instagram theme, or the seasons are changing and you need to keep up. You want to change the whole look and feel of your grid, but you’re afraid of destroying your whole aesthetic. How do you make a smooth transition without wrecking the good thing you’ve got going?
That’s what today’s post is all about. I’ve received a lot of requests for a post about Instagram and since the seasons are changing and a lot of grids are changing with it, I thought this would be a perfect topic! Instagram is fun, but it can also be stressful. Because we just want our grids to look #aesthetic, but sometimes that’s easier said than done.
So today we’re going to learn how to transition between themes (and seasons) seamlessly and effortlessly, without destroying our aesthetic. Grab your grid and a cup of tea…and let’s dive right in!
PICK A FILTER TO TRANSITION WITH
First things first, decide the feel you want your new theme to have. I like a seasonal grid, so right now I’m transitioning from summer to fall — which means I’m going from bright and bold colors, to a warmer and softer vibe. I love the burnt orange look, almost vintage, so I’m switching over to a warm, muted filter: L7 on VSCO.
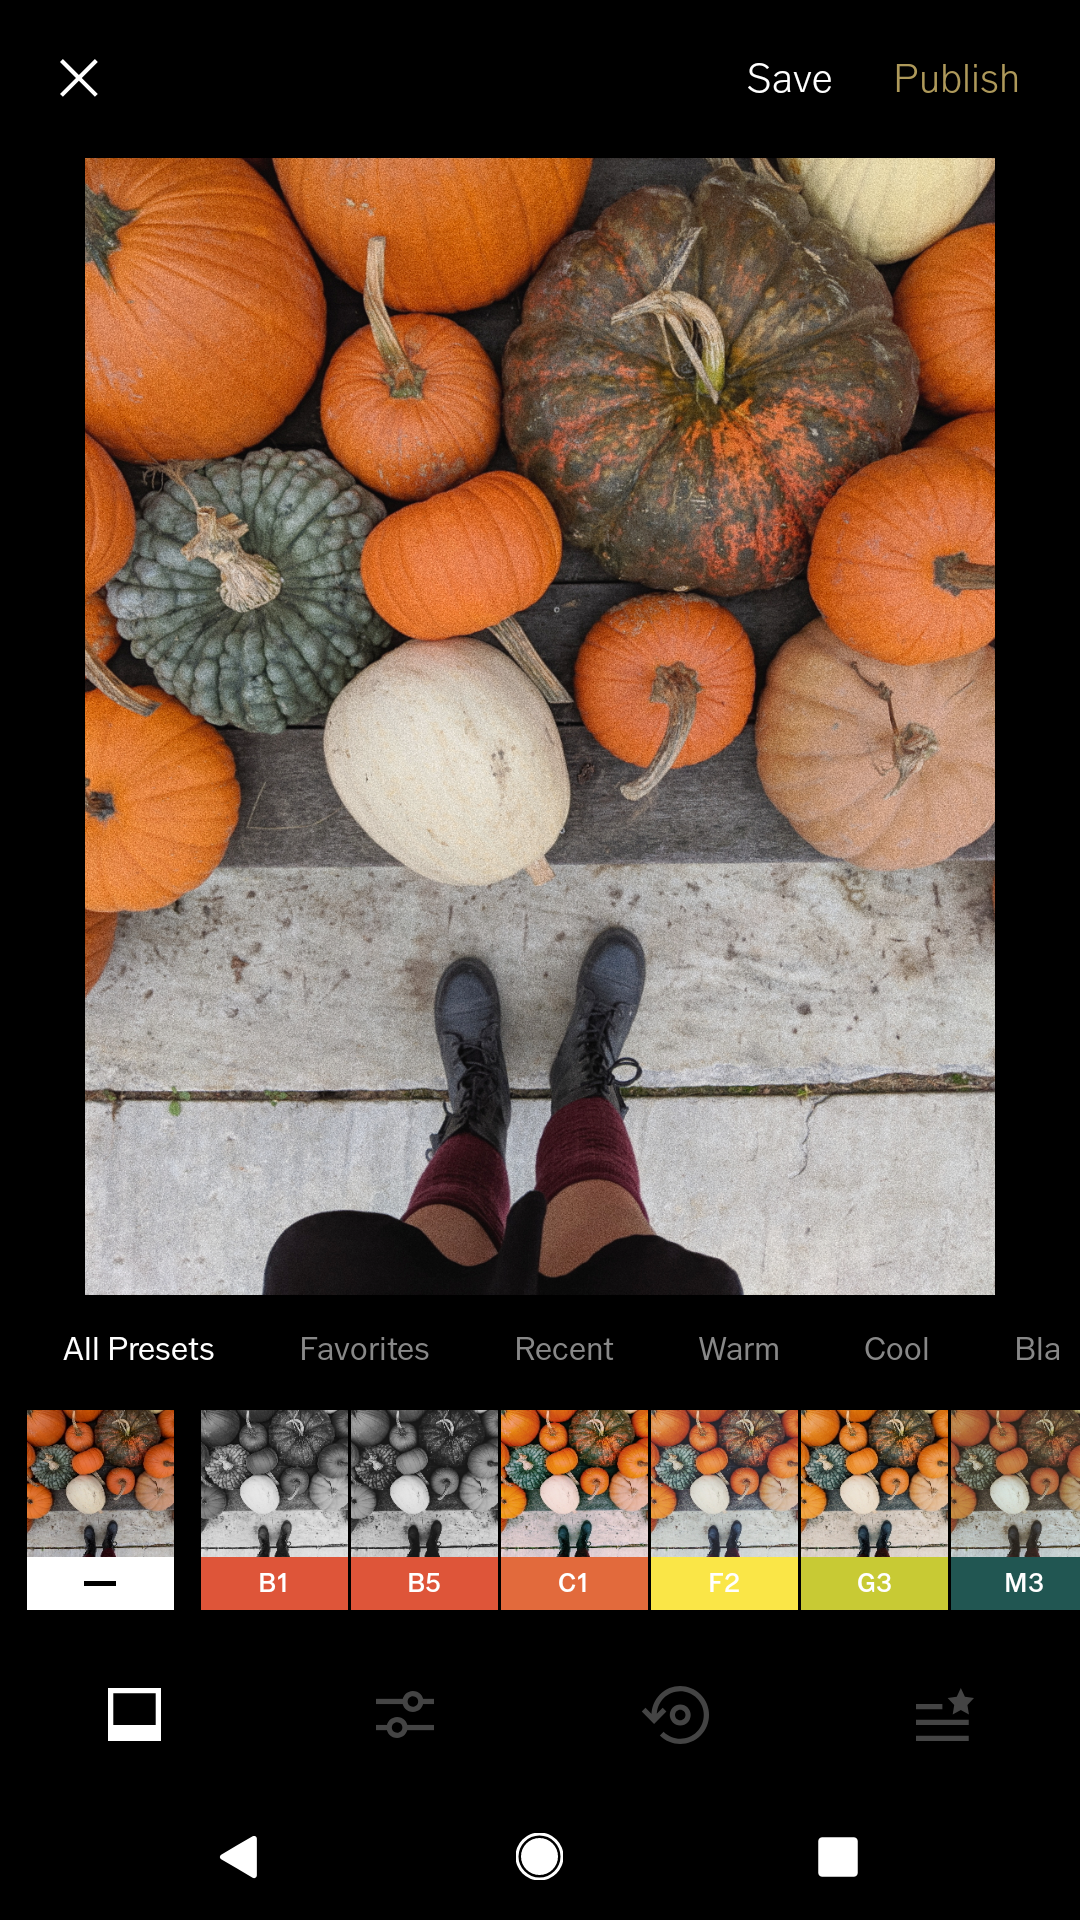
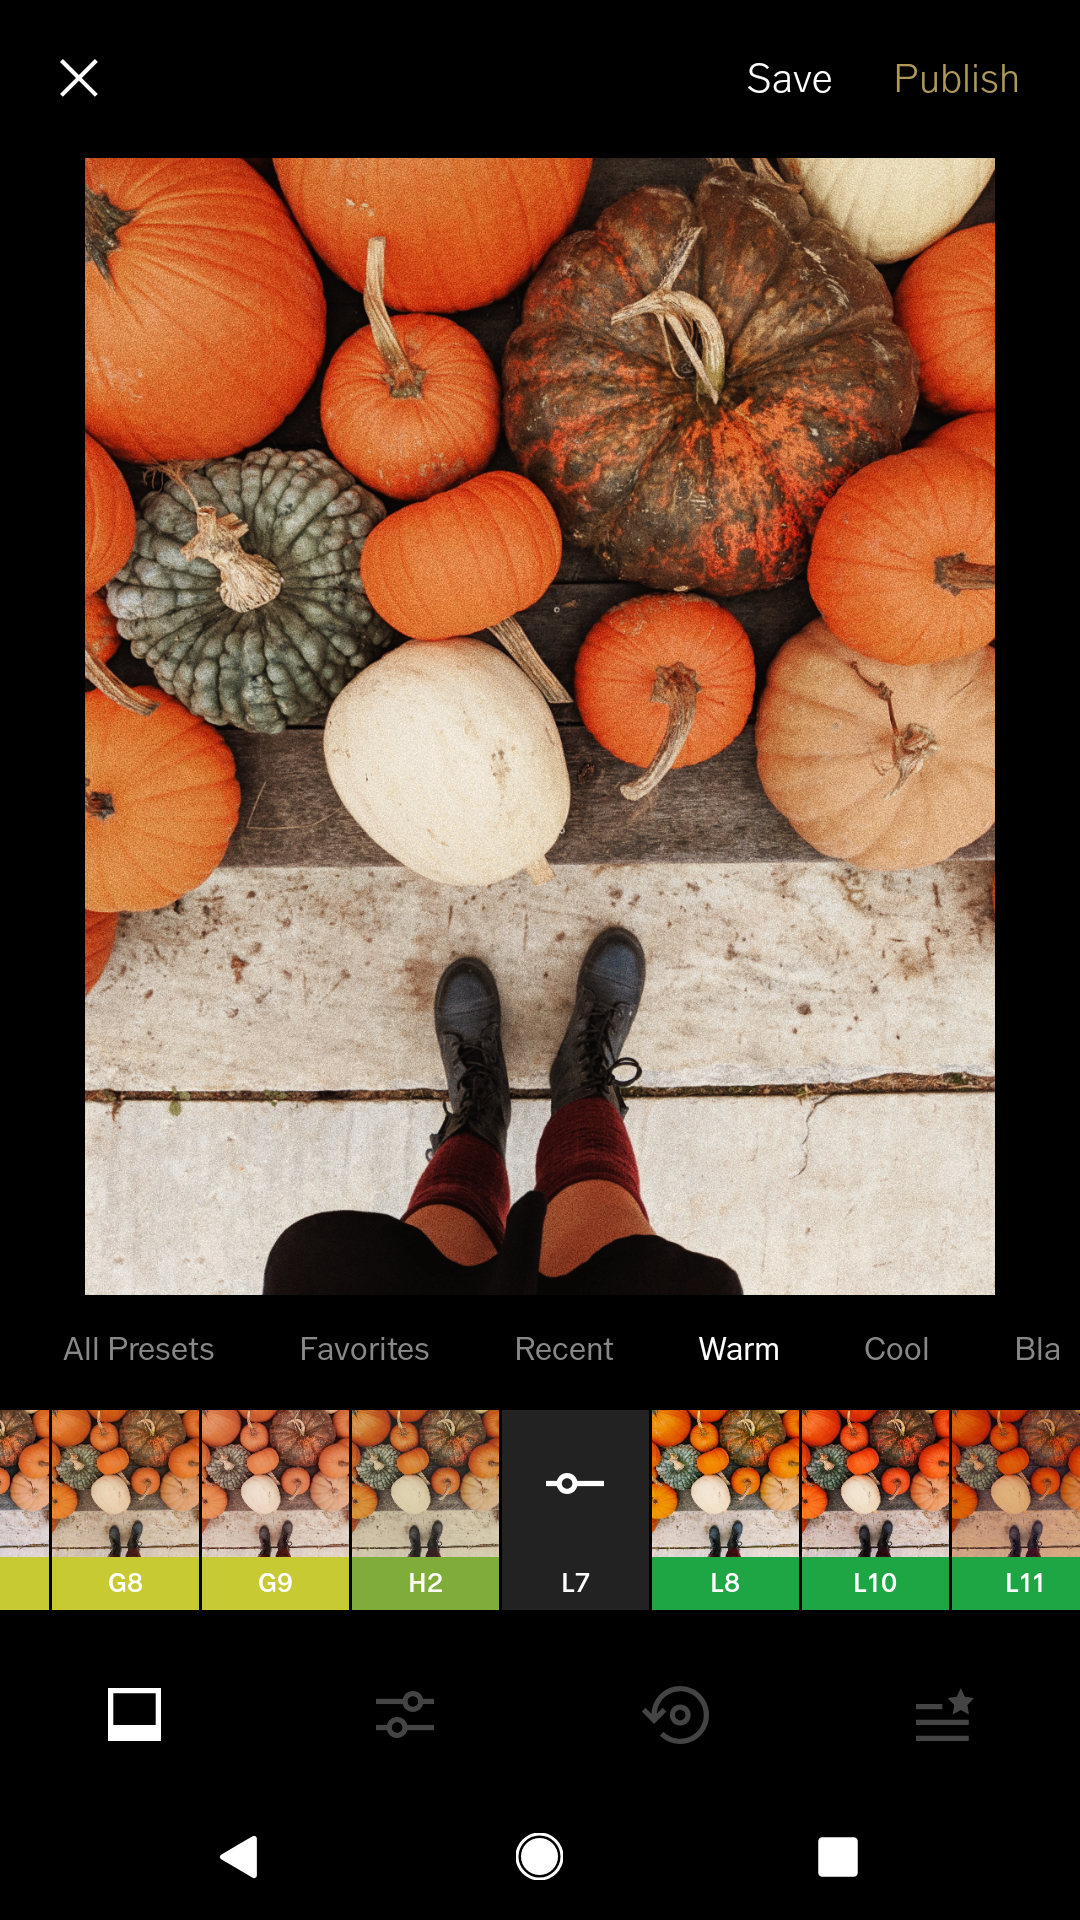
One of the keys to blending your themes smoothly is to change your filter but BEFORE you change your theme. So lets say you want to go from warm to cool, or bright to soft, pick a filter that has the look you want and start using it before you change your theme. You can also use the fader on VSCO to add just a little of the filter on your already-edited photo.
PICK YOUR NEW THEME’S COLORS
You probably have some primary colors (at least two or three) that you’re using right now. You need to decide what your NEW primary colors are going to be, in order to transition into them. My favorite transition is fall — going from bright colors to warm colors. This summer, my primary colors were: blue, yellow, white, and a little bit of green. Now that I’m blending my grid into fall, my new primary colors will be: burnt orange, gold, and brown. Now that I know what those colors are, I can better plan my theme.
Keep in mind that the more different your new colors are from your old ones, the harder it will be to transition. So if you’re going from an all-white theme to a bold, bright, colorful theme, you might want a pastel in-between theme.
FADE THOSE COLORS LIKE AN OMBRE
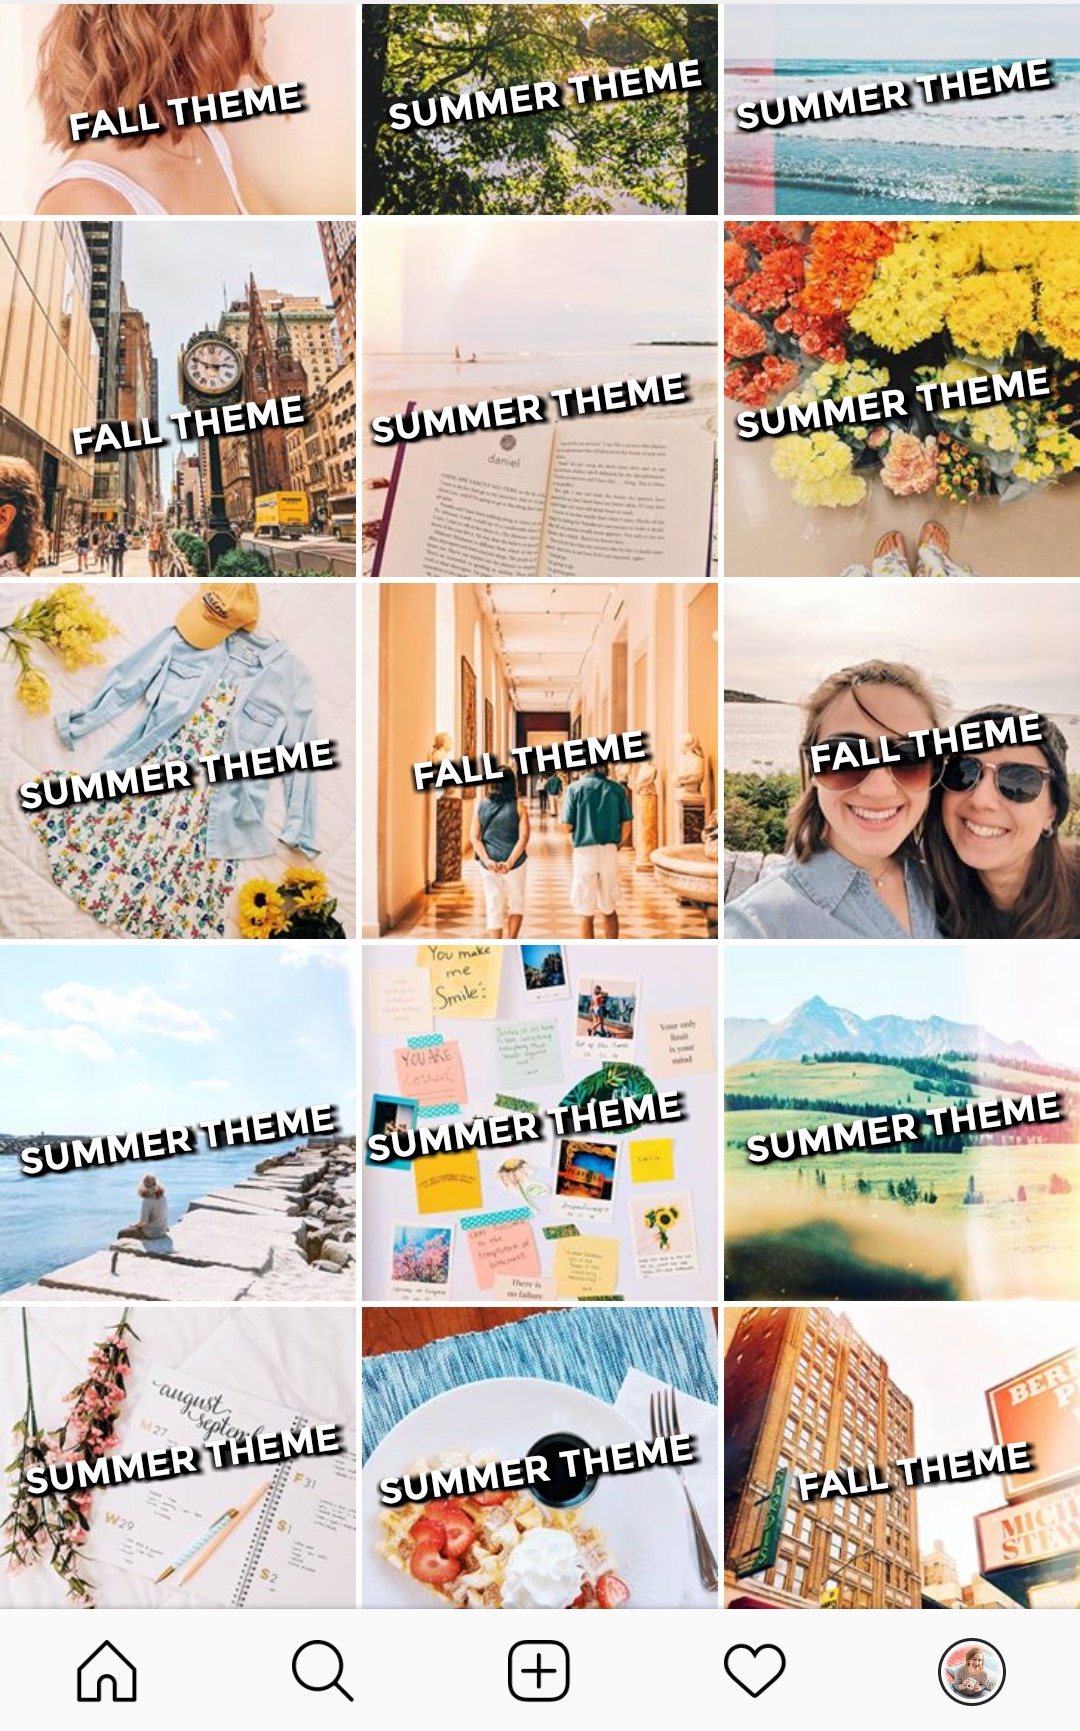
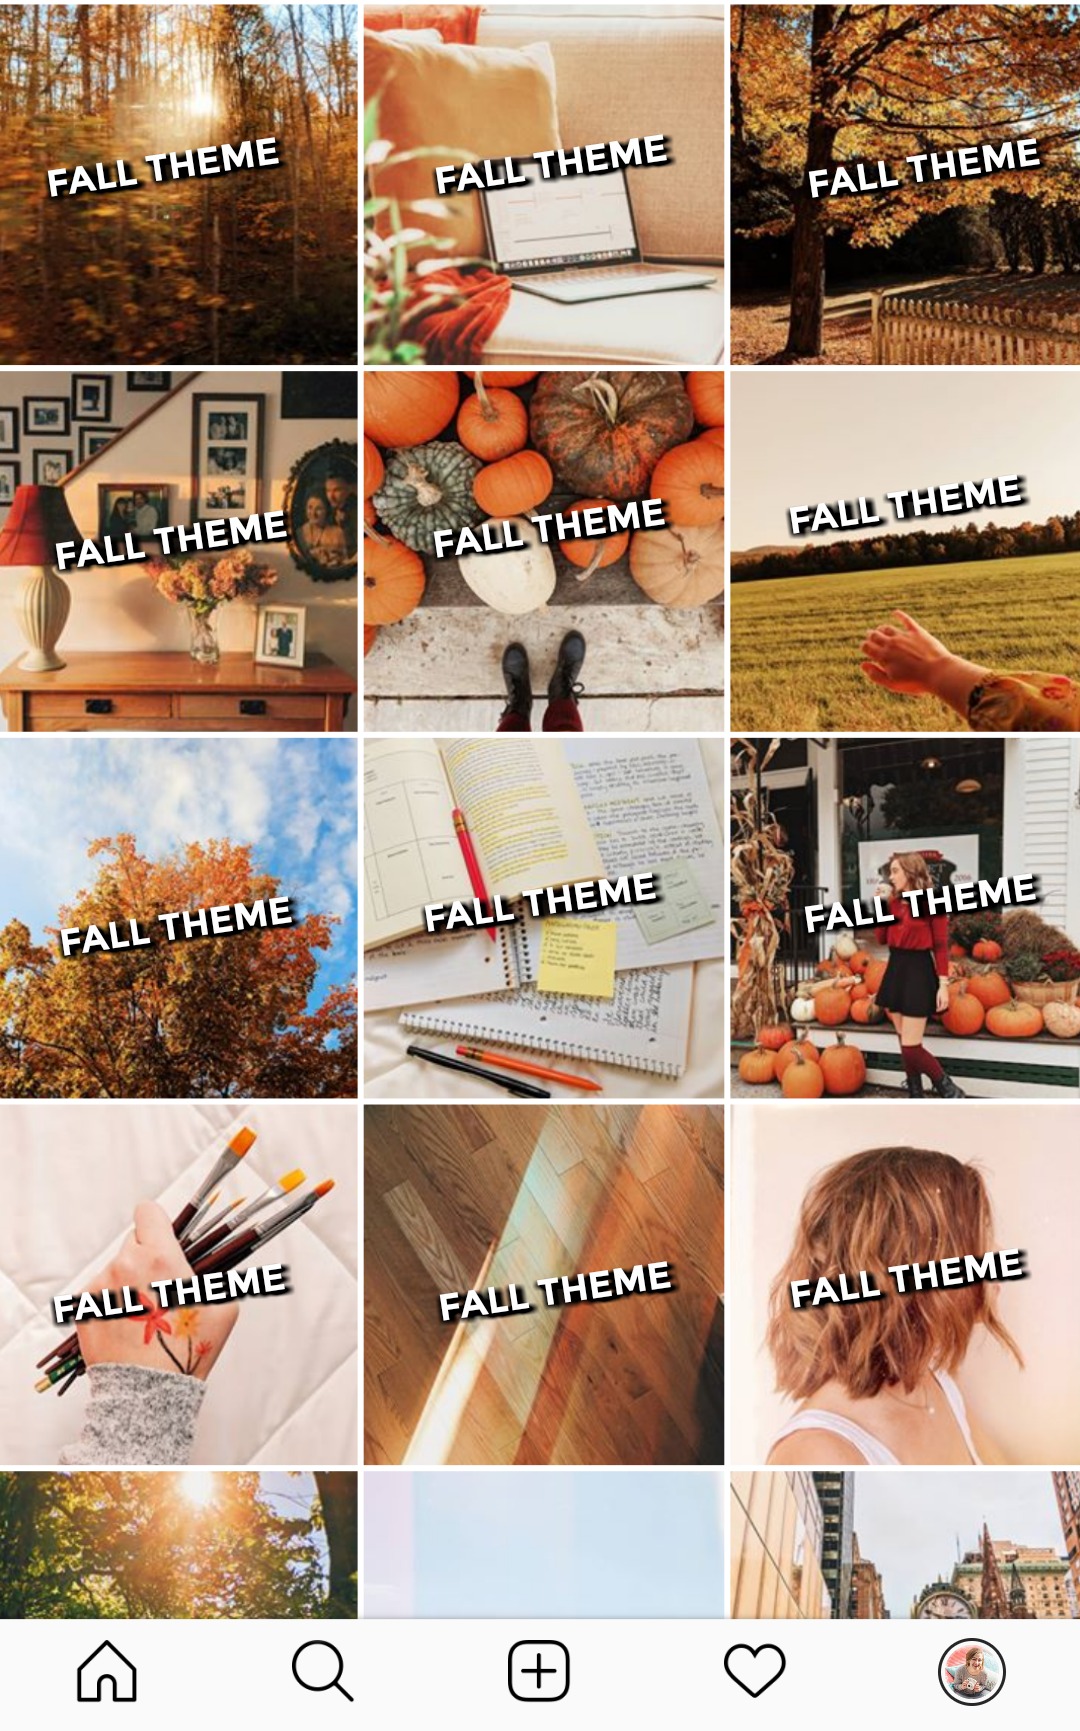
Now comes the complicated part — the actual fading into a new theme. Don’t panic! It’s actually easier than it seems. The thing about fading into a new theme is just blending your posts so that it’s not ALL OF A SUDDEN SOMETHING DIFFERENT. You’ve already picked your new filter, so now it’s time to start incorporating some of those new primary colors.
Let’s take my grid for example. When I decided to start transitioning into a fall theme, I posted just one or two photos introducing the new colors. Take a look at the transition below. See how the golds, browns, and burnt orange colors are sparse? As time goes on, I start to post more and more fall theme pictures, until my grid has totally transitioned into a fall theme.
FIND INSPIRATION ON PINTEREST
NO IDEAS?? Pinterest is your answer. A while ago I published a post on how to create a beautiful grid by “copying” an aesthetic you build from photos on Pinterest — but here’s the point: it’s perfectly fine to gather ideas from other people and take your own photos that look very similar. If you don’t have an eye for photography (I sure as heck don’t) then find some pics that strike your fancy and see what you can learn from them!
Figure out how that person took the photo — what kind of lighting they used and the different props involved in the shot. Make your own version that’s unique to you and YOUR life! Then incorporate the photo you’re copying into your grid. (For some reason other people’s photos always look much better than our own.) I love using Pinterest to gather inspiration for my Instagram — because it really gives you a feel for how photos look next to each other, and how they compliment each other to create a bigger picture.

TEST DRIVE YOUR GRID
THIS IS MY SECRET INSTAGRAM WEAPON: the test drive grid. Otherwise known as a private dummy account where I don’t follow anyone and nobody follows me — a place where I post all my photos BEFORE I post them on my official account, so that I can see how they look next to each other!
If you’ve never tried this, prepare for it to CHANGE UR LIFE. Have you ever posted a photo, thinking it will look good in your grid, then IMMEDIATELY REGRET IT?? Because it actually looks TERRIBLE??? The Test Drive Grid™ saves you from this humiliation. You can post and delete as much as you want without spamming your followers and concerning them about your emotional stability!! It’s a life-saver.
GO FORTH AND GRAM
Remember, Instagram isn’t about having the perfect grid — after all, what DOES PERFECTION LOOK LIKE?? It’s subjective for every person. Beauty is in the eye of the beholder. Which is why Instagram has to be first and foremost about HAVING FUN. Make a grid that makes YOU happy to look at. This app is supposed to make you smile, not make you stress and pull your hair out lol. JUST ENJOY IT, DUDE.

TALK, BRO
Drop your Instagram handle in the comments blow! What theme are you transitioning into? Do you do seasonal themes or something totally different? WHAT’S YOUR FAVORITE THING ABOUT FALL?? (other than all the great aesthetics?!)
LOVE THIS POST? PIN IT!